
You might think turning your old bike into an e-bike is a complex puzzle. It’s not. Converting a standard bike into an electric powerhouse could be your next weekend project.
But, let’s get real for a second—will it save money? Is it as reliable as a factory model? And, most importantly, how do you ensure it doesn’t turn into a garage decoration? These are real concerns.
You’re not alone in wondering if this DIY adventure pays off. Ask yourself two questions: Do I enjoy tinkering with tech and mechanics? Do I crave more zip in my daily ride without buying a new bike? If you said ‘yes’ to either, maybe it’s time to consider the e-bike conversion kit route.
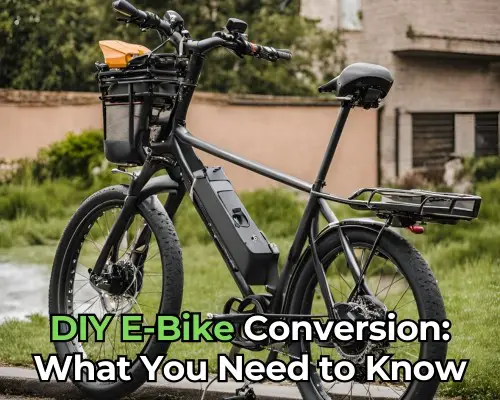
DIY E-Bike Conversion: What You Need to Know
Deciding if an E-Bike Conversion is Right for You
Skill Level: Turning your regular bike into an e-bike isn’t just about following steps. It demands some mechanical savvy.
If gears and spanners aren’t your thing, you might want to team up with a mechanic. This can ensure your setup is not only safe but also efficient.
Cost: Think the kit is all you pay for? Think again. Prices range from $500 to over $1500. Add tools and unexpected trips to the bike shop, and your budget could stretch. Sometimes, a shiny new e-bike might be the economical path after all.
Bike Compatibility: Your trusty old ride might not be the best candidate. Best results often come from converting road bikes, mountain bikes, or hybrids.
An older bike might struggle with the extra heft and hustle of e-bike components.
Intended Use: What’s your e-bike dream? Zipping through city streets or leisurely countryside rides? Each vision might require different specs.
Motor strength, battery life, and durability vary based on use. Make sure your dream doesn’t turn into a garage-bound nightmare.
Choosing the Right Conversion Kit
Motor Types: Hub motors fit in the wheel and are a popular pick. Mid-drive motors, attached near the pedals, offer balance and better hill performance. Your choice affects ride feel and bike balance.
Battery Specs: Most kits use 36V to 48V lithium-ion batteries. Capacity matters—10Ah might suffice for short commutes, but longer adventures might need 20Ah or more.
Control Systems: How do you want to manage your ride? Options include a simple thumb throttle or sophisticated pedal-assist systems that gauge your pedaling and adjust power accordingly.
Displays and Controls: A good display shows speed, battery life, and more. It’s not just about numbers; it’s about convenience and safety on the go.
Choose kits from trusted brands like Bafang or Tongsheng to avoid the common pitfalls of lesser-known manufacturers.
Installation Steps
Prep Work: Start by stripping the bike down. Remove the rear wheel and any relevant components to make space for the new motor hub.
Motor Installation: Fit the new motor. Alignment and secure fitting are crucial for both performance and safety.
Battery Mounting: Secure the battery pack firmly to the frame. Route cables carefully to avoid snags and loose ends.
Wiring: Connect the motor, battery, and controls. This step is vital for a smooth ride.
Add Ones: Install any additional sensors, displays, and throttle components. Each piece adds functionality and enhances your riding experience.
Testing: Don’t skip the test ride! Check all functions and adjust as needed to ensure everything works harmoniously.
Maintenance and Safety
Battery Upkeep: Charge and store your battery according to the manufacturer’s guidelines. Battery health is key to your bike’s longevity.
Regular Checks: Keep an eye on all moving parts. Regular maintenance can prevent most mid-ride mishaps.
Tire Care: Well-maintained tires are crucial for safety. Check for wear and ensure they are always properly inflated.
Legal Awareness: Stay informed about local laws regarding e-bikes. Compliance is essential for both safety and legality.
Safety First: Always prioritize safety. A well-maintained e-bike is a safe e-bike. Enjoy the ride, but keep it responsible.
Understanding E-Bike Conversion Kits
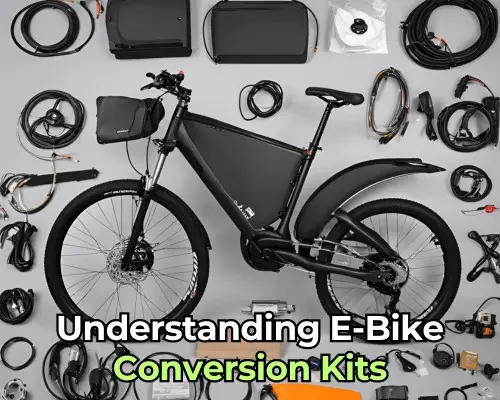
Choosing the proper e-bike transformation unit can feel like confusion. But with the proper data, it’s an astound you’ll be able to unravel. Here’s a more profound see into what you would like to know to form the leading choice.
Types of E-Bike Conversion Kits Explained
Mid-Drive Kits:
Imagine hitting the mountain trails with seamless power delivery that feels just like pedaling—only easier.
That’s what a mid-drive kit offers. Installed at the bike’s crank, it drives power directly to your bike’s drivetrain, rather than just one wheel.
This central placement ensures optimal weight distribution, crucial for maintaining balance in rugged terrains. Perfect for those who want a robust ride without sacrificing the natural feel of biking.
Rear Hub Kits:
Think of this as the workhorse of conversion kits. It’s straightforward, reliable, and offers a boost of power directly to the rear wheel, pushing you forward. It’s the easiest to install and manage, making it ideal for urban commuting or leisure rides.
You’ll feel the difference mostly when accelerating or climbing hills, as it transforms your ride into a more responsive machine.
Front Hub Kits:
Front hub kits turn your front wheel into a dynamo. While they can slightly affect steering sensitivity, they’re generally very adaptable and work with almost any bike.
This is a great choice if you’re looking for a simple installation with a noticeable improvement in flat terrain cruising.
Key Components of a Conversion Kit
Motor:
Your e-bike’s unused heart. Accessible in models extending from 250W (culminate for level city commuting) to 750W (which can handle soak slants with ease).
Keep in mind, that the higher the wattage, the more control over your transfer, but too the speedier the battery depletes.
Battery:
Think of this as your fuel tank. Advanced e-bikes ordinarily utilize lithium-ion batteries since they’re lighter and have a longer life expectancy than other sorts.
A 48V 20Ah battery, for occurrence, can final for over 40 miles on a single charge, depending on utilization.
Continuously select a battery with a tall capacity if you arrange to ride longer separations.
Controller:
The brain that connects your muscle (the motor) to the energy (the battery). It determines how much power to deliver based on your pedaling.
Some controllers come with customizable settings, allowing you to tailor your bike’s response to your riding style.
Display/Controls:
Your bike’s dashboard. This can range from basic LED displays showing speed and battery level to advanced LCD panels offering GPS tracking and detailed motor control.
The more sophisticated the display, the higher the control and customization of your ride.
How to Choose the Right E-Bike Conversion Kit for Your Needs
Intended Use:
Seriously, think about where you’ll ride. If you’re planning on mountain biking, the rugged mid-drive system will serve you best.
For city commuting, a rear hub kit might be all you need, providing smooth assistance without altering the bike’s handling too much.
Bike Compatibility:
It’s like fitting a puzzle piece. Not all frames can handle all kits, especially older models or those with unique frame shapes. Check compatibility to avoid costly mismatches.
Power and Range:
More power equals more fun, right? Well, it also means more battery consumption. Assess your typical ride length and terrain type.
If you’re only doing short city trips, a smaller battery could suffice, keeping the bike lighter and more agile.
Ease of Installation:
Do you feel confident in your DIY skills? Front and rear hub kits can usually be installed at home with basic tools and a bit of patience.
Mid-drive kits, offering the best performance for serious riders, might require professional installation.
Regulations:
Stay on the right side of the law. Many places have power limits (often 250W) and speed caps for e-bikes.
Exceeding these can classify your ride as a motor vehicle, subjecting it to different laws and potentially requiring a license.
Step-by-Step E-bike Conversion Process
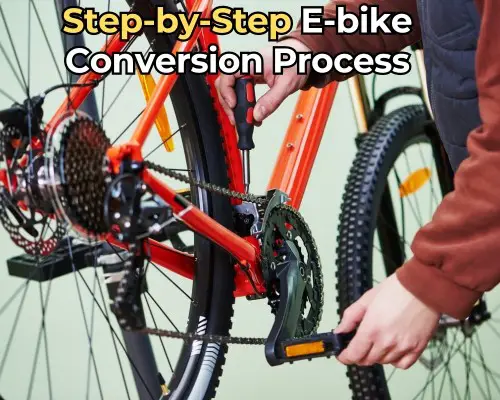
Transforming your regular bike into an e-bike isn’t just about following instructions; it’s about understanding the nuances that make the ride your own. Here’s how to navigate the conversion process with finesse and expertise.
Preparing Your Bike for Conversion
Clean and Inspect: Start with a clean bike. Sounds simple, right? But a thorough clean can reveal hidden issues like tiny cracks or rust, especially around the bottom bracket and dropouts—areas crucial for e-bike conversions.
Replace any worn parts, as a weak link could compromise your upgraded ride. It’s like setting the stage before the main actor walks on.
Measure for Compatibility: Imagine installing your kit only to find the motor bumps against your frame—frustrating, isn’t it? Avoid this by measuring frame dimensions meticulously.
About 85% of standard bikes are compatible with conversion kits, but your ride could be in that tricky 15%.
Verify dimensions like bottom bracket width and rear dropout spacing. This ensures you won’t be part of the return-and-exchange dance later.
Remove Obstacles: As you strip down the bike, think of it as peeling back layers that aren’t needed. Removing racks or fenders isn’t just about clearing space; it’s about minimizing weight and potential interference with new components. Each unnecessary part removed is a step towards a sleeker, more functional e-bike.
Installing the Motor: A Detailed Guide
Wheel and Motor Setup: Hub motor installations are common among DIY enthusiasts because they balance simplicity with performance.
If you choose a rear hub, remember, it will change your bike’s weight distribution slightly. Ensure it’s aligned perfectly to avoid any pull or drag that could affect riding dynamics.
Connect and Secure: Securing the motor and routing cables isn’t just about following diagrams. It’s about crafting a system where every part works in harmony.
Use zip ties and protective sheathing to safeguard wires from wear and tear. A clean setup reduces maintenance issues and preserves your bike’s aesthetic.
Test Fit: After installation, spin the wheel by hand before hitting the road. It should rotate smoothly, without wobbles or rubbing. This is your last checkpoint to catch any installation errors.
Setting Up the Battery and Wiring System
Battery Installation: Choosing the correct spot for your battery influences more than fair aesthetics; it impacts the bike’s center of gravity.
A well-placed battery can make your bike feel adjusted and responsive, instead of top-heavy or lumbering.
Wiring Connections: While connecting, imagine each wire as a vital artery, crucial for bringing your bike to life.
A loose connection can lead to power drops or unexpected shutdowns. Secure each connection and consider using dielectric grease for extra protection against moisture and dirt.
Control Setup: Positioning your controls within easy reach isn’t just convenient; it’s crucial for safety. The throttle and display should be at your fingertips, allowing for adjustments on the fly without losing focus on the road.
Common Installation Challenges and How to Overcome Them
Ensure Compatibility: Even with careful planning, you might find certain components don’t fit as expected.
Keep a set of spacers and adapters handy—they can be the difference between a frustrating project and a smooth setup.
Handle Wiring with Care: To prevent electrical mishaps, follow a meticulous wiring guide. Consider consulting online forums or installation videos specific to your kit. Sometimes, real-world advice can illuminate issues not covered in standard instructions.
Secure the Battery: If the provided mounts don’t feel secure, don’t hesitate to customize. Some cyclists use additional straps or even custom-made brackets to ensure the battery stays put over rough terrain.
Mitigate Noise: A little noise is normal, but excessive rattling can signal loose parts. After your first ride, re-check all fittings. Tightening a bolt or adjusting a bracket now can prevent bigger issues down the road.
Maintenance and Upkeep for DIY E-Bikes
Keeping your DIY e-bike in prime condition requires attention to detail—much like preparing for a big trip where you check your packing list twice.
Here are essential maintenance tips peppered with expert insights to enhance your bike’s performance and longevity.
Routine Maintenance Tips for DIY E-Bikes
Regular Inspections: Begin each ride with a quick once-over. Tighten bolts and fasteners to ensure everything is snug—just like double-checking your luggage handle before a flight. It’s simple, but it can prevent a mishap mid-journey.
Drivetrain Care: Your drivetrain is the heart of your bike’s movement. Clean it regularly with a proper degreaser and apply a lubricant meant for e-bikes.
This not only reduces wear but keeps your ride smooth, much like how a well-oiled hinge operates silently and effortlessly.
Tire and Brake Check: Correct tire pressure helps you ride efficiently, using less battery and reducing strain on your tires.
For brakes, keep them finely adjusted—good brakes are like having a reliable safety net, ready when you need them.
Battery Care and Longevity
Smart Charging: Prolong your battery’s life by charging it just right. Don’t keep it fully charged all the time; instead, aim for 80% for daily use and only full charge for long rides.
This habit can extend your battery’s usable life, much like avoiding overcharging a smartphone to keep its battery healthy longer.
Temperature Matters: Store and charge your battery in a stable environment. Extreme temperatures can sap its vitality, so think of storing your battery like you would a fine wine—in conditions that are ‘just right.’
Handling Mechanical Wear and Tear
Regular Component Checks: Frequent inspections and timely replacements of brakes and chains are crucial.
Opt for high-quality replacements that can handle the extra torque of an e-bike. It’s a bit like choosing hiking boots over sneakers for a rugged trail—suitability and durability matter.
Suspension and Steering Upkeep: Maintain your suspension and steering to ensure a smooth ride. Proper care here can prevent the rough rides that lead to quicker wear and tear, much like regular car tune-ups prevent breakdowns.
Wheel Care: Regularly check your wheels—keeping them true and spokes tight ensures stable and efficient rides. It’s akin to keeping your car’s wheels aligned for optimal handling.
As an Amazon Associate, I earn from qualifying purchases, at no additional cost to you. Read Our Affiliate Disclosure.