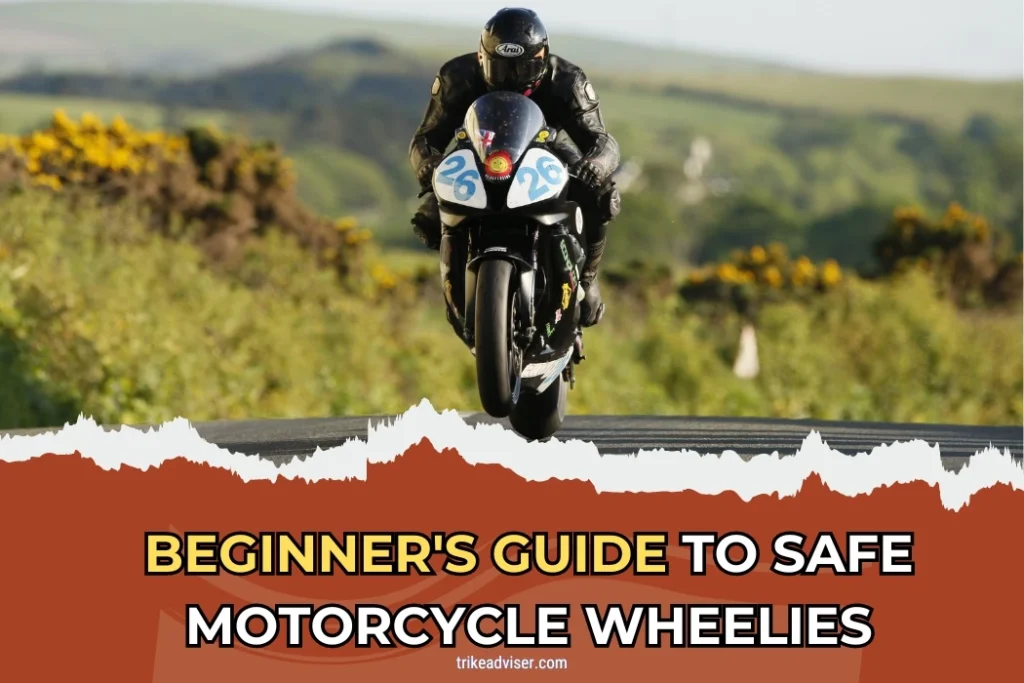
Popping your first wheelie? It sounds thrilling, right? Yet, the rush comes with risks. Many new riders eye the stunt with both eagerness and fear.
It’s an iconic motorcycle move—synonymous with freedom and skill. But get it wrong? The consequences are real.
Why do so many attempt it? The excitement, the challenge, it’s undeniable. But safety first. You might wonder: How do I start? What bike should I use? How can I keep it safe? Is it legal everywhere?
We’ll address these, ensuring your first wheelie isn’t your last. This isn’t just about keeping the rubber side down. It’s about mastering control, understanding your bike, and respecting the ride.
Tips to Perform a Safe Motorcycle Wheelies For Beginners
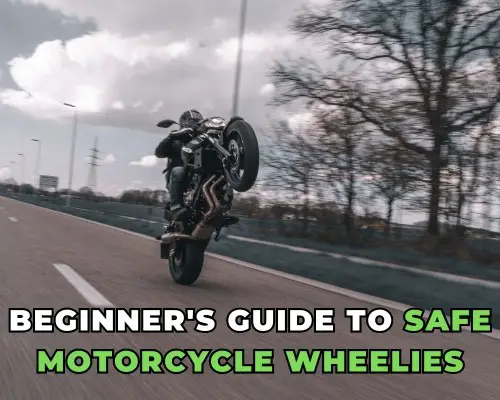
Choosing the Right Surface
Starting your first wheelie? Think the right surface doesn’t matter? It does, more than you might guess. Slick areas are a rookie mistake—they kill grip and balance.
Instead, opt for slightly sticky dirt or a grassy incline. Here’s a tip: an uphill start lowers the balance point, making it easier to lift the front wheel without overdoing it. It’s like using training wheels but for wheelies!
Proper Seating Position
Where you sit can make or break your wheelie attempt. You might not think it, but shifting your position just a few inches can change everything.
Try to keep your seating close to the rear axle; this aligns your hips with the bike’s center of gravity, essential for finding that elusive balance point.
Tight knees are not just for control—they’re your secret weapon for stability, keeping you connected to the bike, especially when it starts to sway.
Clutch and Throttle Control
Ever heard of clutch popping? It’s your new best friend for wheelies. Here’s the drill: slow down, clutch in, a little throttle, and then—snap! The clutch comes out, and up goes the front wheel.
But here’s the kicker: you don’t need a lot of throttles. Too much and you’re on your back before you know it.
It’s like seasoning food; too little and it’s bland, too much and it’s ruined. Aim for just enough to connect those two cones you’ve set up as markers.
Setting Practice Goals
Those cones aren’t just random markers; they’re your roadmap to mastering wheelies. Start with them about 15-20 feet apart and focus on lifting the front wheel by clutch popping to coast to the next cone.
Why keep it minimal? Because you’re training your muscle memory, not showing off. The real goal is to achieve smooth, controlled lifts, not high-speed chases.
Mastering the Back Brake
This is where good wheelies turn into great ones. Getting the front end up is just the start. Controlling it with the back brake is where the magic happens.
Think of it as your safety net, allowing you to tap it gently to bring down the front wheel safely if you overdo the lift.
Most beginners forget the brake until it’s too late—practice this until your foot knows what to do without your brain reminding it.
Throttle Management
Avoid hard throttle chops. If you’re descending too fast, don’t overreact with the throttle. Small adjustments are best.
Over-throttling can lead to faster falls, risking serious injury. Practice gentle throttle use to maintain balance.
Understanding the Mechanics of a Wheelie

Wheelies are not just show-off moves; they are an exact science. Understanding the art and physics behind this stunt is crucial to mastering it safely and effectively.
The Role of Physics in Wheelies
Angular Momentum and Torque
Sounds straightforward, right? Let’s delve deeper into the physics. Performing a wheelie is all about the right application of angular momentum and torque. How you engage the clutch or throttle can dramatically alter the bike’s response:
- Clutch Wheelie: Imagine revving the engine, the clutch disengaged—your bike’s heart beating fast. Then, in a split second, you engage the clutch. The bike responds with a surge of power that lifts the front wheel.
- Power Wheelie: Or perhaps you prefer the sheer force approach. A swift roll of the throttle and the power does the lifting.
These methods affect the bike’s angular momentum, dictating the dynamics of the front lift. Getting it right feels like magic, but there’s solid physics at work.
Fine-tuning Your Technique
Why does this matter? Understanding torque lets you control the wheelie’s intensity. It’s not just about pulling back and hoping; it’s about finesse, about feeling the bike’s power and reacting in tandem.
Analyzing the Dynamics of Balance and Control
Forces and Balance
Maintaining a wheelie is like juggling forces. You’ve got the rear tire force propelling you forward, countered by inertia and drag:
- Rear Tire Force: It’s the push from the back, the thrust that says ‘let’s go’.
- Inertia and Drag: These are the party poopers, the forces that want to keep things steady and unexciting.
Center of Pressure
Imagine a line through your bike, from front to back, balancing on the rear wheel like a seesaw. This line, or the center of pressure, is where aerodynamic forces meet. Managing this delicate balance is what keeps the bike in a wheelie without tipping over or slamming down too soon.
Counter steering and Leverage
Ever noticed how bikers lean subtly when they turn? That’s counter steering. In wheelies, it’s about subtle shifts, slight leans that keep you upright and in control. It’s less about brute strength and more about smart moves.
Practical Tips for Mastery
- Simulate Before You Execute: Try mimicking the wheelie motion off the bike. Feel the motion without the momentum.
- Record and Review: If possible, record your attempts. Visual feedback can help correct your posture and technique.
- Incremental Learning: Start with small lifts. Gradually increase as you become more comfortable with the balance and throttle control.
Understanding the mechanics of a wheelie isn’t just about pulling off a stunt; it’s about embracing the physics of your motorcycle and merging it with your instincts as a rider.
With each attempt, you aren’t just practicing; you’re learning the language of your bike, getting attuned to its quirks and capabilities.
Step-by-Step Guide to Performing a Wheelie
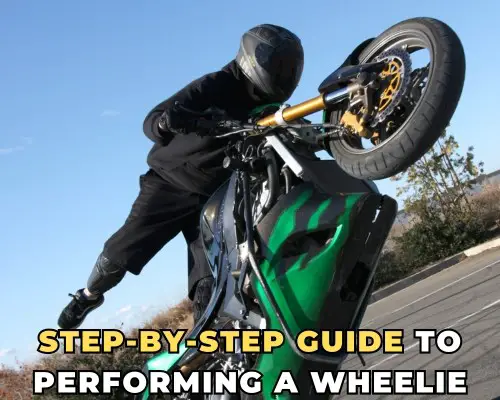
Mastering a wheelie is about precision, patience, and practice. Here’s how you can rise safely above the rest, with some expert tricks to keep you in perfect balance.
Initial Setup and Positioning
Gear Up for Safety
- Start in first gear—this is your best choice for control at a manageable speed.
- Choose a practice area as open and empty as a Sunday morning town square. Ensure it’s free of obstacles and traffic.
- Suit up! Don’t skimp on a full-face helmet, gloves, and protective clothing. Like knights readying for battle, your gear is your armor.
Finding Your Balance
- Adjust your seat like you’re settling into a rocket; lean slightly back. This isn’t just sitting; it’s positioning for power.
- You’re looking for the ‘Goldilocks zone’ of balance on your bike—where it feels just right.
The Role of the Clutch and Throttle
Power Wheelie Technique
- Imagine the throttle as your bike’s laugh—twist it and the front lifts in joy. But be mindful, too much and things can get out of hand.
- This maneuver shifts the bike’s weight dramatically to the rear, requiring a deft touch and nerve.
Clutch Wheelie Method
- Clutch in, rev high—it’s like pulling back a slingshot. Let go, and the bike leaps forward. It’s thrilling but requires precision.
- Fine-tune the throttle like you’re adjusting the volume of your favorite song—just enough to keep the rhythm flowing without overwhelming the melody.
Maintain Control
- Think of the throttle and clutch as your dance partners in this high-stakes ballet. It’s all about harmony and timely responses.
Balancing Techniques During a Wheelie
Stay Centered
- Relax your body; a tense rider is a shaky rider. Breathe as if you’re meditating—calm and deep.
- Keep your weight centered. It’s like being the calm eye in the storm of motion.
Use Your Body
- Your knees, chest, and elbows aren’t just along for the ride; they’re your balancing tools. Shift subtly, and control smoothly.
- Plant your feet firmly on the pegs. They’re your roots, keeping you grounded even as you lift.
Master the Brake
- Your rear brake is your emergency button. Use it to gently coax the front wheel back to earth when you’re ready to end the wheelie.
Additional Tips for Perfecting Wheelies
Start Slow, Grow Slow
- Begin your wheelie career at a crawl, not a sprint. Get to know your bike’s reactions like it’s a new friend.
- Increase speed with experience. Each notch-up should feel as natural as stepping up a staircase.
Keep It Steady
- Steady speed is the secret to not just doing a wheelie, but mastering it. Sudden changes are your enemy.
- Wheelie practice isn’t just practice; it’s ritual. Repeat it, refine it, and respect it.
Safety and Environment
- Always choose a controlled environment for your wheelie attempts. Think of it as your stage.
- Safety is your number one fan—it should always be in the front row, cheering you on.
These tips and techniques aren’t just about doing a wheelie; they’re about weaving skill, balance, and safety into one fluid motion.
Remember, the true art of the wheelie isn’t just about lifting the front wheel—it’s about elevating your entire ride.
Common Mistakes and How to Avoid Them

Being an expert wheelie involves more than just performing the ideal lift; it also involves understanding what not to do. Let’s examine the dangers in more detail so that your ascent is as safe and comfortable as possible.
Overcompensation and Loss of Control
The Mistake:
Sounds familiar, right? The front wheel lifts, adrenaline kicks in, and instinctively, you might pull your feet off the pegs in panic, much like throwing your hands up during a scare. This reaction disrupts control, potentially leading to crashes.
How to Avoid:
- Gradual Progression: Start small, lifting the front wheel just a few inches off the ground, and gradually increase as your confidence builds.
- Maintain Contact: Your feet should cling to the pegs like a burr on a sock. They stabilize your balance and keep you in command.
- Brake Mastery: Master the rear brake like it’s a lifeline—it can bring you back from the brink by controlling the wheelie’s height.
Expert Tip: Think of the rear brake as your trusty ‘undo’ button; a light tap can save you from going over backward.
Misjudging Speed and Timing
The Mistake:
Ever turned up the music too loud, only to jump at the sound? That’s what misjudging your speed during a wheelie can feel like. Going too fast too soon, or lifting too gently, can unbalance the bike and lead to instability or crashes.
How to Avoid:
- Speed Control: Start at a snail’s pace. The thrill can wait for the skill.
- Incremental Speed Increases: Just like adding spice to a dish, increase speed gradually until it’s just right.
- Throttle Precision: Learn the art of throttle control. It should be smooth and steady, like painting a straight line.
Expert Tip: Practice with a focus on feeling each motion. Wheelies are about rhythm and response more than brute force.
Emergency Situations: Quick Decisions
The Mistake:
Freezing up or panicking in a pinch can turn a minor mishap into a disaster. It’s like forgetting your lines on stage—the more you panic, the worse it gets.
How to Avoid:
- Reflex Practice: Like a firefighter train for emergencies, practice your responses until they’re second nature.
- Brake Familiarity: Always know where your rear brake is, and be ready to use it. It should feel as natural as blinking.
- Calm Under Pressure: Keep a cool head. When things go awry, breathe deeply, assess quickly, and act smoothly.
Expert Tip: Regularly simulate wheelie ’emergencies’ in a controlled environment to sharpen your quick-decision skills.
A Note on Practice
- Consistency is Key: Regular practice isn’t just good for building skills—it’s essential for safety. The more familiar the action, the less likely you are to panic.
- Safety First: Always gear up fully for every practice session. It’s tempting to go light on a hot day, but skin and asphalt aren’t friends.
Science of Wheelie Tire Pressure – PSI Explained
Tire pressure isn’t just a minor detail—it’s a critical factor that can dramatically influence your wheelie performance. Let’s break down the nuances of PSI to ensure you’re riding not just hard, but smart.
Understanding Tire Pressure Ranges
Ideal PSI Range
Navigating the PSI for wheelies is like tuning a guitar; each adjustment can change the performance.
Typically, the sweet spot is between 15 to 20 psi in the rear tire. But, as any seasoned rider would attest, the ideal pressure can feel as personal as a signature:
- Lower PSI (15-17 psi): This range increases the tire’s contact with the ground, akin to widening your sneakers for better balance. It’s perfect for those just starting with wheelies at lower speeds where stability is key.
- Higher PSI (18-20 psi): Think of this as putting on running shoes for a sprint. Less contact area means less drag, enhancing steering and reducing wobbles at higher speeds.
Tailoring PSI to Wheelie Types
Slower Speed Wheelies
- Why Lower PSI Works: At a crawl, you want all the stability you can get. Lower PSI makes the tire grip the road like a hand to a railing, offering the control needed to maintain a steady wheelie.
- Tip: Experiment by starting at 15 psi. Adjust in small increments, like fine-tuning a musical instrument, until you find the pressure that feels just right.
Higher Speed Wheelies
- Why Higher PSI Works: At speed, precision is paramount. A higher PSI ensures the tire is nimble, ready to respond to quick steering adjustments—critical when the pace picks up.
- Tip: Increase your PSI gradually. It’s about finding a balance that lets you dance with the bike, not wrestle it.
Factors Influencing PSI Choice
Rider Experience
- Beginners: Might prefer the forgiving nature of a lower PSI as they get to grips with their bike’s balance.
- Experienced Riders: Often prefer a higher PSI that offers less resistance and more feedback from the road.
Type of Bike
- Sport Bikes vs. Dirt Bikes: The former may perform better with a higher PSI due to their design and typical usage, whereas dirt bikes often benefit from a lower PSI due to varied terrain conditions.
Riding Conditions
- Consider the Canvas: Your riding surface is the canvas to your paint. Soft, muddy, or wet conditions might necessitate a lower PSI for better traction, much like choosing a wider brush for broad strokes.
Consulting the Experts
Get Professional Insights
- Before you adjust, talk to those who have mastered the craft. Seasoned riders or mechanics can provide insights that are not just theoretical but honed through years of experience.
- Check Manufacturer Specs: Your bike wasn’t born in a vacuum. Manufacturer specs are a great starting point because they take into account the design and intended use of your tire.
Fine-Tuning for Perfection
Just like you wouldn’t wear your shoes too tight or too loose, the right tire pressure for wheelies isn’t about following rules—it’s about crafting them to fit your style, your bike, and your conditions.
Test, tweak, and transform your ride into something that feels like an extension of yourself. Remember, the best riders are those who listen—not just to advice, but to the subtle feedback of their bike beneath them.
As an Amazon Associate, I earn from qualifying purchases, at no additional cost to you. Read Our Affiliate Disclosure.