
Have you ever hammered the brakes as well and found yourself flying over the handlebars? It’s not fair to you. Acing the craftsmanship of braking is significant, however, numerous riders mess it up.
Why? Braking, especially on mountain bikes, involves more than a simple squeeze. Are you making these common mistakes? Maybe you’re braking too much at the front, or your timing is off, turning trails into trials.
Before you next hit the slopes, consider this: Are you applying your brakes smoothly and progressively? Or do you hammer them at every turn, praying not to crash? Getting your technique right can mean the difference between a thrilling ride and a spill.
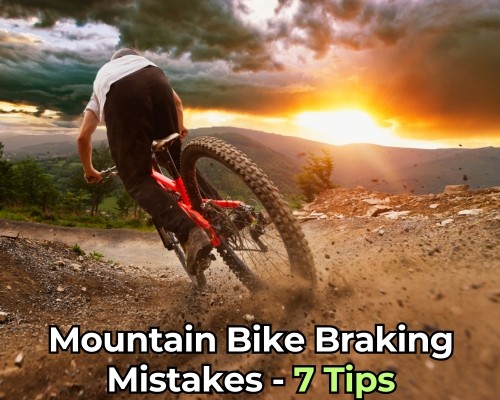
Mountain Bike Braking Mistakes – 7 Tips
Improper Brake Setup
Many riders face issues with brakes not functioning properly, often due to poor setup or mechanical flaws. One frequent mistake is getting oil on rear discs during chain lubrication.
This contamination typically results in a howling noise from the rear brake and diminished braking efficiency.
To resolve this, ensure your brake pads and rotor are free from oil—this might require replacing the pads or cleaning the rotor thoroughly.
Worn Out Brake Pads
A critical oversight is letting brake pads wear down too much, to the point where you might contact the metal backing or even the springs.
This not only reduces braking power but can cause severe damage to your rotor. Always check your pads for sufficient material to avoid this costly mistake.
Incorrect Lever Setup
The positioning of your brake levers greatly influences braking power. Optimal leverage comes from properly adjusted levers tailored to your hand size and riding style.
Most riders prefer using just one finger to brake, keeping the levers close enough to the bars for a strong grip without overextending. This setup enhances control and reduces fatigue.
Lever and Disc Alignment
Ensure your disc is perfectly centered and the angle of your levers on the bar is adjusted for easy reach, especially when shifting weight rearward on steep descents.
Proper alignment helps maintain control and prevents accidents, particularly in critical situations where quick braking is necessary.
Braking Technique in Motion
Moving correctly on the bike is as crucial as the mechanical setup. When braking hard, shift your weight far back to prevent going over the handlebars.
Dropping your heels and rolling your wrists behind the bars shifts your weight downwards into the bike, enhancing stability and control.
Understanding Brake Dynamics
Both brakes play roles in stopping, but they should be considered independently. For instance, lightly engaging the rear brake can help maneuver the back wheel around corners, while using the front brake too aggressively can cause the dreaded front wheel washout. Focus on modulating brake pressure smoothly to maintain grip and control.
The Myth of Front Brake Dominance
Contrary to common belief, the front brake is not always the primary stopper, especially on mountain bikes where dynamic weight shifting is essential.
Effective braking on trails involves distributing your weight over the rear tire, utilizing the rear brake predominantly to ensure stability and avoid skids.
The Basics of Mountain Bike Braking
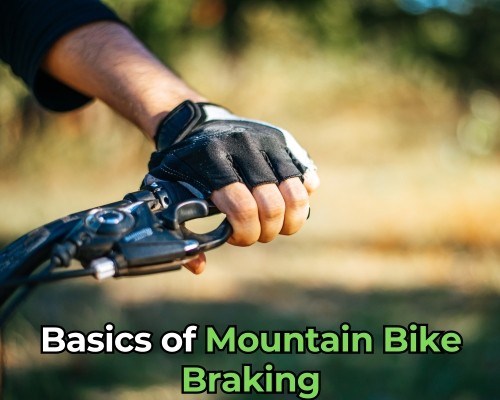
Exploring your mountain bike’s brakes isn’t almost about ceasing control; it’s about fine-tuning your control and riding with certainty.
Let’s investigate the sorts, capacities, and pivotal upkeep tips that might make all the contrast on another ride.
Understanding Your Brakes: Different Types and Their Functions
Disc Brakes: The choice for modern mountain bikers. Imagine you’re descending a slippery slope after a sudden rain—disc brakes are your best ally here, providing reliable stopping power without much effort.
- Hydraulic Disc Brakes: These are like the power steering of your bike. A light touch on the levers and you have immediate, powerful braking with superb control. Perfect for high-speed descents and technical terrains.
- Mechanical Disc Brakes: More hands-on and greater for learning the ropes of braking dynamics. They require a bit more force on the levers, offering tactile feedback that some riders appreciate for better understanding their bike’s response.
- Comparative Insight: On average, hydraulic systems can generate around 140 kg of braking force from just 14 kg of hand force, while mechanical systems need more effort for similar output.
Rim Brakes: These are the traditionalists in the braking world. Lighter and simpler, they work well in dry, less demanding conditions.
- V-Brakes: They offer ample stopping power for everyday scenarios and are ideal for casual trail rides or city biking. Their straightforward mechanism makes them easy to maintain and adjust.
- Cantilever Brakes: These require precise setup but reward you with powerful braking. Favored by cyclocross racers, they provide excellent mud clearance, which is crucial in messy conditions.
Brake Maintenance: Routine Checks and Care
Proper maintenance ensures your brakes are always ready to perform, keeping you safe and enhancing your bike’s longevity.
Comprehensive Care:
- Brake Pad Wear: Regularly check the thickness. If the pad wears down to less than 1.5 mm, it’s time to replace it. Waiting too long could mean metal on metal, damaging your rotors and leading to costly repairs.
- Hydraulic Fluid: Like blood in your veins, the hydraulic fluid should be clean and free of air. Dirty or old fluid reduces braking efficiency—replacing it once a year or after about 100 hours of riding keeps responses sharp and reliable.
- Mechanical Adjustments: Tension and alignment of your brake cables and calipers directly affect performance. Over time, cables stretch and calipers can misalign. Adjust them regularly to avoid any decrease in responsiveness.
Comprehensive Care Tips
- Listen and feel as you brake. Any unusual noises or vibrations indicate potential issues that need immediate attention.
- Engage in routine “brake tests” on safe terrain before heading out on challenging trails. This practice helps you familiarize yourself with the braking response and ensures everything is in top working order.
- Consider professional servicing once a year. Experts can spot issues that you might miss and help optimize your setup for your specific riding style and conditions.
Training Drills for Better Braking
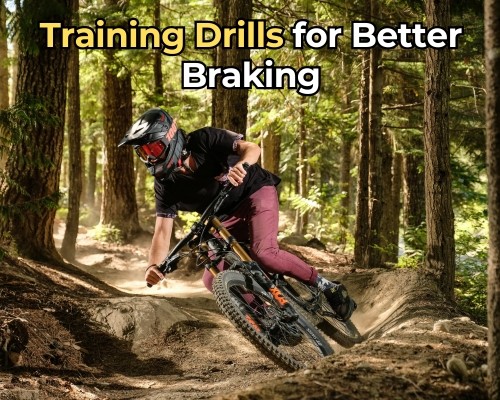
Sharpening your braking aptitudes through focusing on preparing drills can change your mountain biking encounter, improving both your security and control.
Here’s how to join organized hone sessions and progressed reenactment devices into your preparation regimen.
Practice Sessions: Exercises to Improve Braking Skills
Effective braking is more art than science, requiring finesse and timing. Practice these drills to master your mountain bike’s brakes:
1. Rear Brake Only:
- Objective: Learn to modulate the rear brake without locking the wheel.
- Drill: Begin at a low speed and gradually increase, focusing on applying the brake smoothly to maintain traction.
- Progression: As your confidence grows, increase your speed and experiment with different terrains.
2. Front Brake Only:
- Objective: Master the use of the front brake without tipping over.
- Drill: Start at a slow pace and progressively approach higher speeds. Pay close attention to shifting your weight backward as you apply the brake.
- Body Position: Proper body positioning is crucial. As you brake, lean back to counteract the forward motion and prevent falls.
3. Braking for Corners:
- Objective: Develop the skill of braking effectively before a turn rather than during.
- Drill: Approach a corner and brake before entering it. Maintain your speed without braking while turning to ensure smooth cornering.
- Technique: This exercise teaches the separation of braking from turning, crucial for maintaining control through curves.
4. Recovering from a Skid:
- Objective: Learn to regain control after a rear wheel skid.
- Drill: Intentionally lock the rear brake to induce a skid, then modulate the brake pressure to regain traction.
- Control: Practicing this will help you understand how to handle unexpected slips and maintain composure.
5. Slow Speed Braking:
- Objective: Enhance your ability to control braking at low speeds on steep declines.
- Drill: Use only the rear brake to descend a steep slope as slowly as possible.
- Skill Building: This drill improves your brake modulation skills, essential for technical downhill trails.
Using Simulation Tools: Virtual Training for Real-World Skills
Incorporating simulation tools into your training can provide insights that are hard to replicate in the real world without risk.
Virtual Braking Techniques:
- Simulation Software: Use tools like Linkage Bike Suspension Simulation to model different braking scenarios.
- Benefits: These tools allow you to experiment with various bike setups and understand how suspension and bike geometry affect braking.
- Application: Simulate emergency stops, different weights, and speeds to see how your bike behaves, then apply these insights during actual rides.
Analyzing Performance:
- Data-Driven Learning: Simulations provide a unique opportunity to study the effects of different braking techniques and setups in a controlled environment.
- Improvement: By understanding the mechanics and dynamics through simulations, you can fine-tune your braking skills without the physical risks associated with high-speed trials.
By mixing real-world hone with virtual preparation, you not as it were upgrade your physical capacity to brake viably but also extend your understanding of the fundamental standards that oversee bicycle dealing.
This comprehensive approach guarantees that after you hit the trails, you’re prepared not fair with superior aptitudes, but also with wealthier information on how to utilize them viably.
Upgrading Your Braking System for Your Mountain Bike
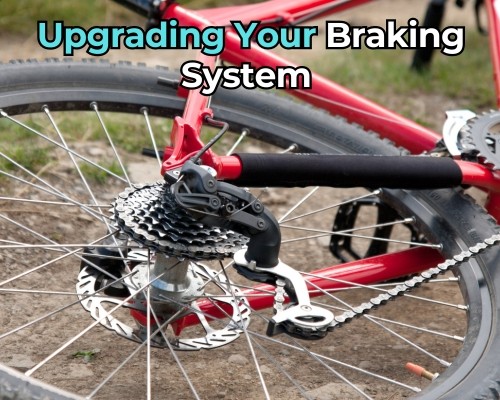
Optimizing your mountain bike’s braking framework isn’t almost about upgrading execution; it’s around fitting your bicycle to fit your riding fashion and needs.
Whether you’re plummeting through rough scenes or cruising on level trails, the right brakes make all the qualifications.
Choosing the Right Brake Pads and Rotors: What to Look for
Overhauling brake cushions and rotors can change your ride, giving you the control and certainty required for any territory.
Brake Pad Compound:
- Organic/Resin Pads: These cushions offer a gentler nibble and calmer operation, perfect for casual riding. In any case, they tend to wear out speedier, particularly in sloppy or damp conditions.
- Semi-Metallic Pads: A crossover of strength and execution, these cushions are compelling over an assortment of conditions and give steady braking control, even though they can be marginally noisier.
- Sintered/Metallic Pads: For the serious downhill racer or aggressive rider, these pads provide the best in durability and heat resistance, perfect for long descents and harsh conditions.
Rotor Size and Material:
- Rotor Size: Larger rotors (180mm, 203mm) increase the braking surface, enhancing stopping power—essential for downhill or heavy bikes. Smaller rotors (160mm), while less powerful, reduce weight and are adequate for lighter trail use.
- Rotor Material: Stainless steel rotors offer better durability and resistance to heat compared to standard steel. This makes them a superior choice for riders who demand high performance.
- Rotor Thickness: Thicker rotors resist warping under extreme conditions and maintain performance over time, while thinner rotors are lighter and suitable for less aggressive riding styles.
Hydraulic vs. Mechanical Brakes: Which Is Better for You?
Choosing between pressure-driven and mechanical brakes is vital depending on your riding requests and upkeep eagerness.
Hydraulic Disc Brakes:
- Performance: They offer unmatched stopping power with minimal effort, thanks to fluid dynamics that transmit force more efficiently.
- Modulation: Water-powered brakes give smoother and more controlled braking, permitting for exact speed alterations without the jerky movement of mechanical frameworks.
- Maintenance: While they require more complex maintenance such as bleeding and fluid changes, the performance payoff is significant, especially for regular riders in varied terrains.
Mechanical Disc Brakes:
- Cost-Effectiveness: These are generally more budget-friendly and simpler to maintain, making them ideal for beginners or casual riders.
- Maintenance Simplicity: Easier to repair and adjust in the field, mechanical brakes use a cable system that, while prone to stretching and contamination, is less complex than hydraulics.
- Hand Force: They require more hand strength to achieve similar stopping power, which can be a drawback during long rides or steep descents.
Making the Choice:
- Consider hydraulic brakes if you’re a serious rider seeking optimal performance and are okay with the additional maintenance. They are particularly beneficial in wet climates or for downhill riding where control and reduced hand fatigue are paramount.
- Opt for mechanical brakes if you are new to mountain biking, prefer simpler maintenance, or ride mostly in dry conditions where extreme braking power is less crucial.
As an Amazon Associate, I earn from qualifying purchases, at no additional cost to you. Read Our Affiliate Disclosure.